Surrealistic Water Portraits

A little over 6 months ago I experimented with portraits in the bathtub and with water as an experimental photo shoot which you can find by clicking here. I fell in love with the concept of water in my portraiture. I decided to do a similar shoot but I wanted a female model this time. I added a few different feminine elements such as the light blue color of the water and the addition of flowers. I hope you enjoy these images.

132A8107132A8111132A8113132A8117132A8126132A8140132A8151132A8159132A8160132A8169132A8175132A8178132A8190132A8198132A8207132A8219132A8227132A8234132A8241132A8244132A8248

Click here for more summer photo shoots!

Camera: Canon 7D Mark ii

Lens: Canon 24-70mm

Aperture: 2.8

ISO: 125

I will be posting a tutorial on how to shoot in the water later this month so stay tuned, it will be linked here.

Want to do a shoot together? Click here for booking and pricing information!

Want to see more of my summer shoots? Click here!

Instagram: @goodallphotos

Facebook Page: @goodallphotographs

Contact me! goodallphotos1@gmail.com

Let’s get shooting!

Pool Portraits

Inspired to create better portraits in the water I recently took some portraits using a pool and natural light to create a very summer-like feel. Here is the full set of images, edited and shot by me.

132A7609132A7614132A7620132A7624132A7634132A7668132A7674132A7677132A7681132A7689132A7715132A7716132A7725132A7790132A7829132A7835132A7843132A7853132A7873132A7882132A7885132A7889132A7898132A7899

Camera: Canon 7D Mark ii

Lens: Canon 24-70mm 2.8 L Series

ISO: 150

Want to do a shoot together? Click here for booking and pricing information!

Want to see more of my summer shoots? Click here!

Instagram: @goodallphotos

Facebook Page: @goodallphotographs

Contact me! goodallphotos1@gmail.com

Let’s get shooting!

How To: Take Pictures Through Windows

Taking photos through windows can be tricky for a photographer no matter your skill set. It’s hard to both focus your camera correctly and still get a cool reflection on the model. After a couple 100 images worth of failed attempts, I mastered how to shoot through a window.

Tips

  • My first mistake came when I decided to have my lens autofocus on the model. My lens naturally focused on the reflection behind me instead of what was in front of it. I learned quickly that it was essential to manually focus to achieve a sharply focused image.
  • Next, I found that it is nearly impossible to get a clear image if the wall behind the window is textured at all. I quickly discovered that the textured, brick wall behind me was ruining my photos and I had to change my positioning to get a clear view. Some of the photos turned out okay but the intense wall texture was too much for many of the images and became distracting as shown in the picture below.
  • 132A7183
  • I also quickly discovered that my shadow might be seen at certain angles so make sure you check and double check that your shadow isn’t distracting from the main subject, sometimes you need to use your shadow to block the sun but in other situations, you’re going to want to avoid that. In the picture below I should’ve used my shadow to allow for less bright sunlight on the model’s face.
  • 132A7415
  • Make sure to direct your model clearly because often times the window is thick and your voice becomes muffled to your model.
  • Do not take the picture if there is something white or light colored behind you because the model’s face will be obstructed. I would recommend finding something darker to cast a shadow and create that true reflective quality. Jessica Whitaker’s video goes more in depth on this concept. 
  • If you follow these tips then you can achieve really good images through a window such as the ones pictured below.

132A7225

132A7188132A7207132A7227132A7233

132A7586132A7585

For more images from these shoots click the links below!

Cafe Portraits & Laundromat Portraits

Camera: Canon 7D Mark ii

Lens: Canon 50mm 1.4 & Canon 35mm

Aperture: 1.4

ISO: 250

Want to do a shoot together? Click here for booking and pricing information!

Want to see more of my summer shoots? Click here!

Instagram: @goodallphotos

Facebook Page: @goodallphotographs

Contact me! goodallphotos1@gmail.com

Let’s get shooting!


Laundromat Photoshoot

I recently did a photoshoot just like this one but I wanted to try it again with different models and different outfits, here are my resulting images. Again I do these weird location photoshoots to show you that no matter where you live or what your surrounding location is you can still have amazing photos.

132A7342132A7346132A7355132A7356132A7373132A7390132A7407132A7428132A7434132A7439132A7440132A7457132A7461132A7478132A7500132A7517132A7534132A7547132A7559132A7568132A7585132A7586

Camera: Canon 7D Mark ii

Lens: Canon 24-70mm 2.8 – mostly shot on 30-35mm setting

Aperture: 2.8

ISO: 250

Click here to check out my first laundromat photoshoot!

Want to do a shoot together? Click here for booking and pricing information!

Want to see more of my summer shoots? Click here!

Instagram: @goodallphotos

Facebook Page: @goodallphotographs

Contact me! goodallphotos1@gmail.com

Let’s get shooting!

Ugly Location, Pretty Portraits

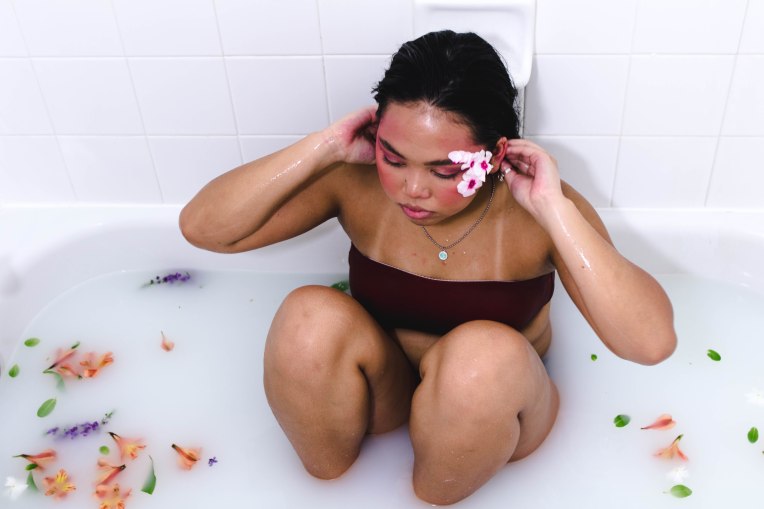
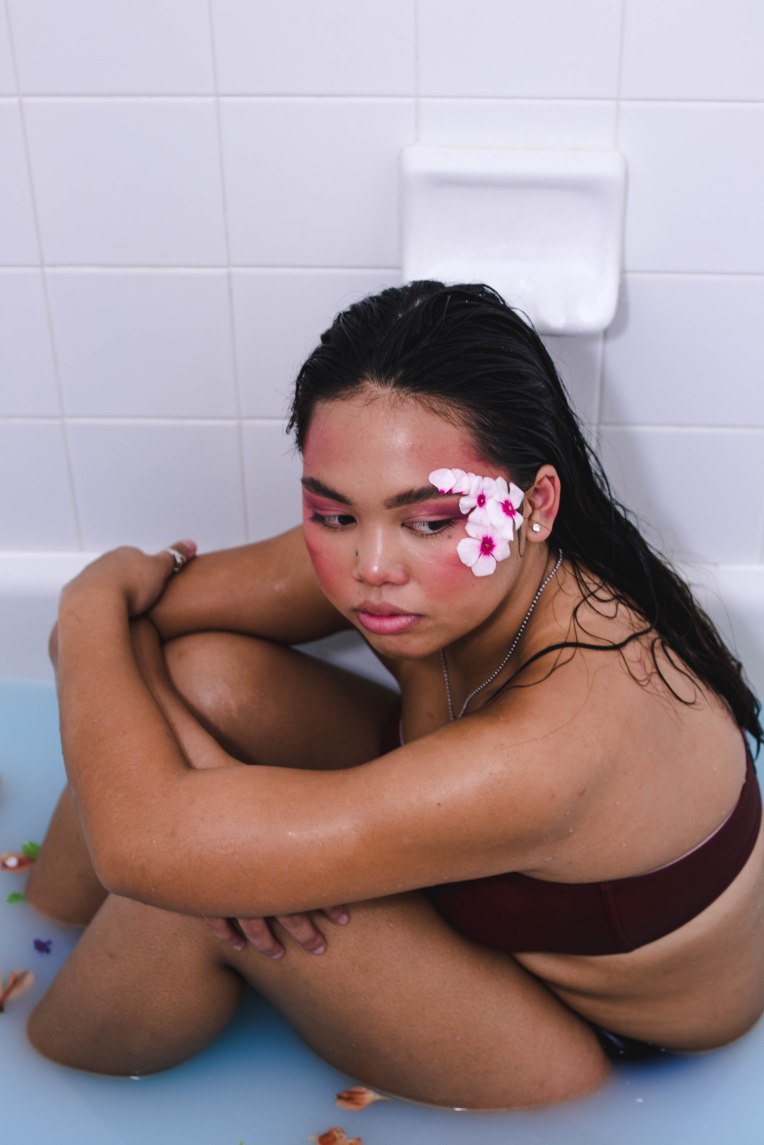
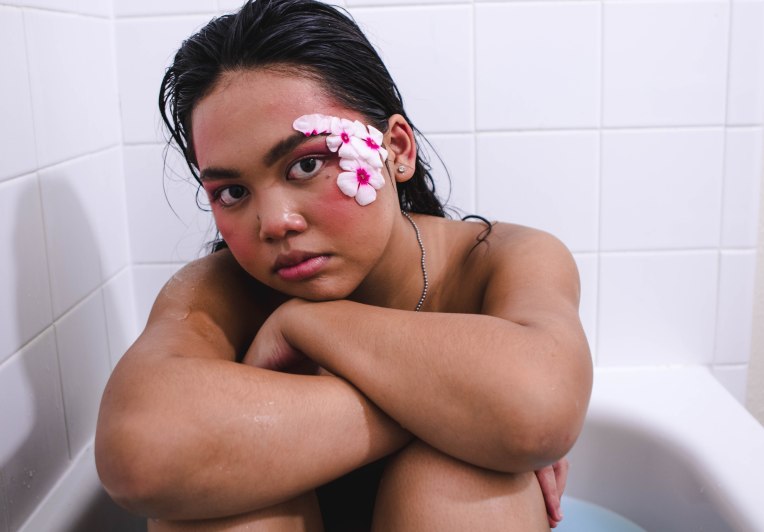
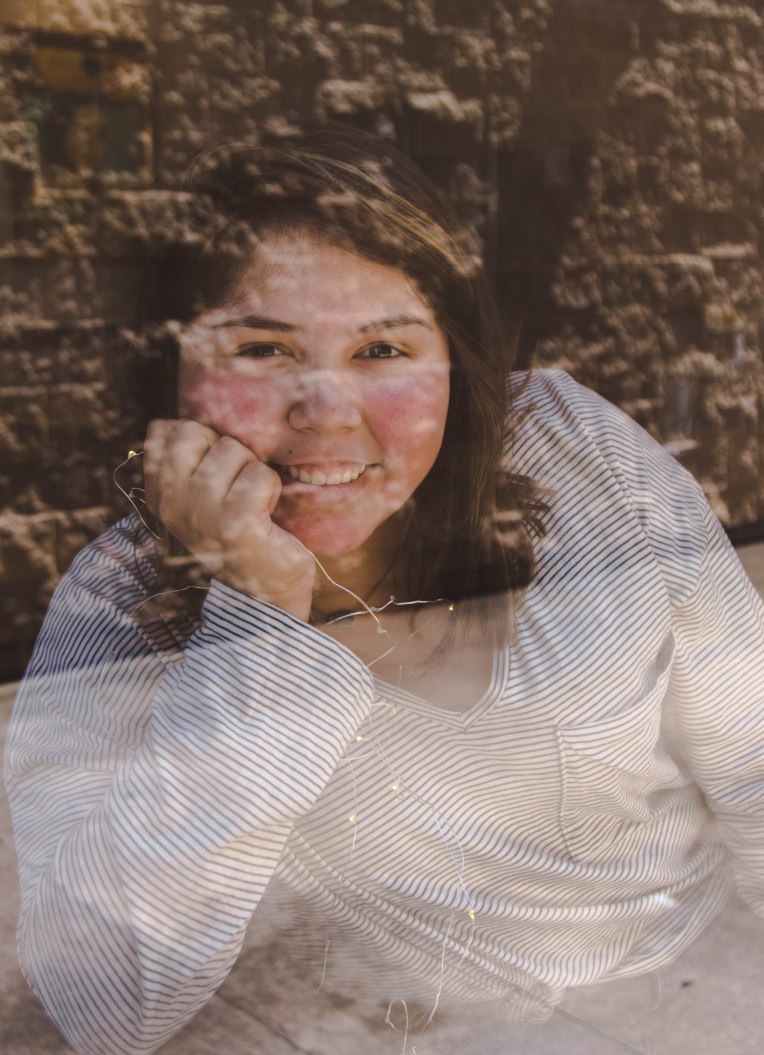
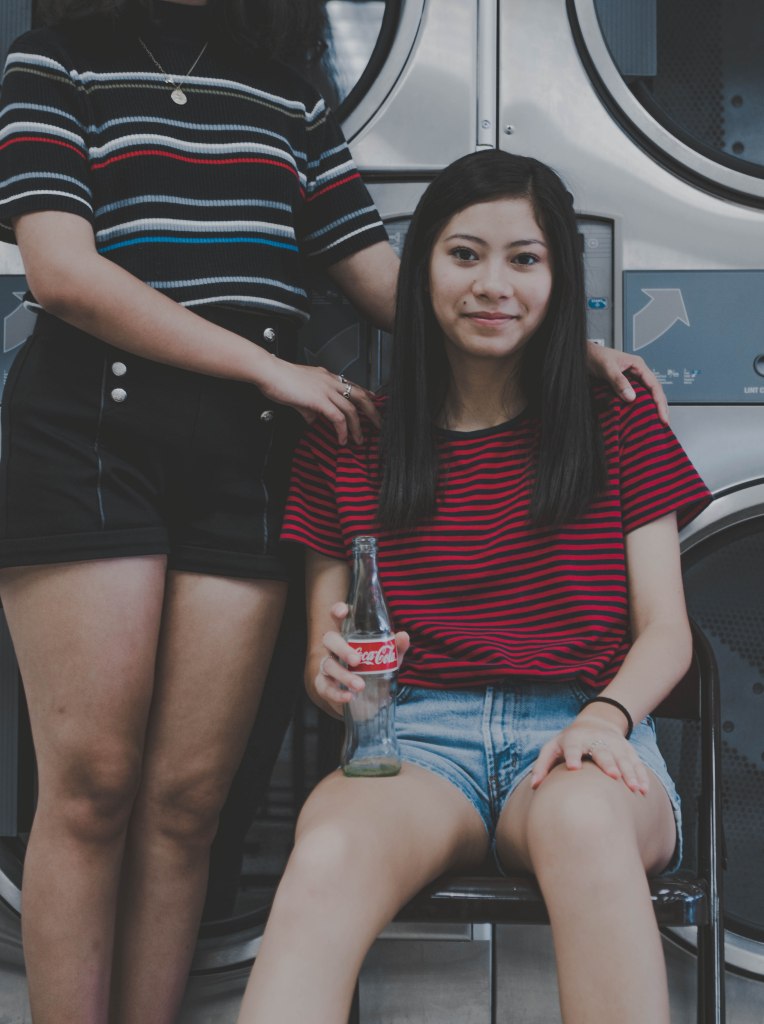
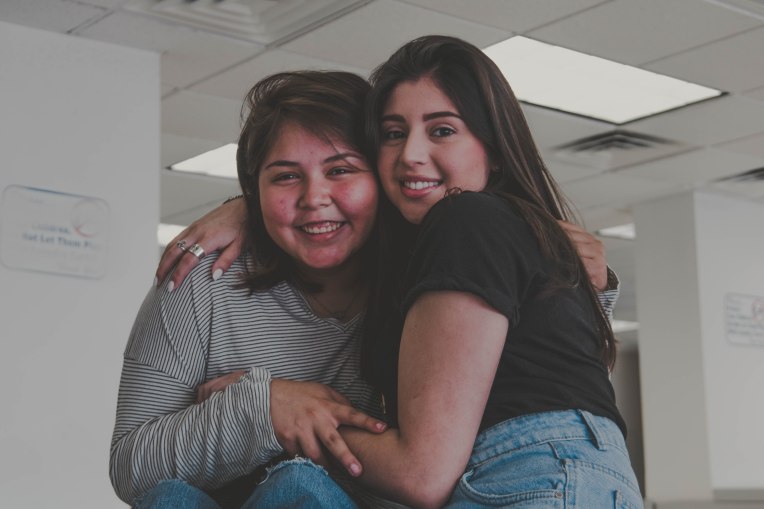
Recently there has been a trend circulating the internet called the “Ugly Location Challenge.” It began earlier this year and seemed to spark notice in many widespread YouTubers, from Niki and Gabi to Aspyn Ovard to Jessica Kobeissi, internet stars took advantage of this trend and encouraged their followers to do the same. The Ugly Location Challenge is taking portraits of a model in an area that would be seen as undesirable to most. For example, some locations often used are Michaels, Lowes, Mcdonalds, Laundromats and grocery stores. I decided to follow the trend and do my own Ugly Location Challenge at a laundromat near my home.

I decided to shoot with my 35mm lens to have more of the background in focus and to really draw more attention to the washers and dryers in the back. I was lucky enough to not get kicked out but I would recommend asking the owner before you begin shooting to ensure that it is allowed and you’re not disrupting their business. I would also recommend going early on a weekday to make sure there is not a lot of people and to have better lighting for your images.

Here is my attempt at the ugly location challenge. I hope this inspires other photographers to realize that location is not everything. Good photographs are not dependent on the location in which you are shooting, good photographs come from natural skill, excellent composition and ability to edit in post. I encourage everyone to not feel limited by where they live or where they are shooting, grab your camera and go take some portraits your location is not everything.

132A6908-2132A7087132A7064132A7039132A7030132A7017132A6998132A6986132A6967132A6950132A6923132A6917132A6915

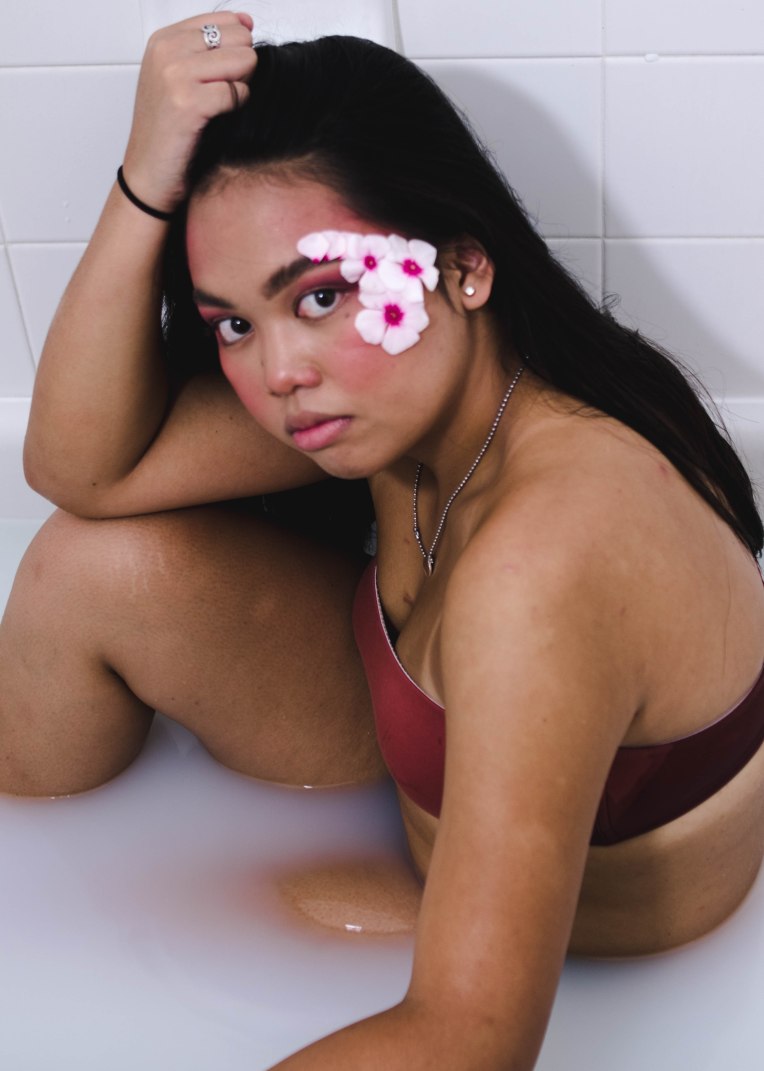
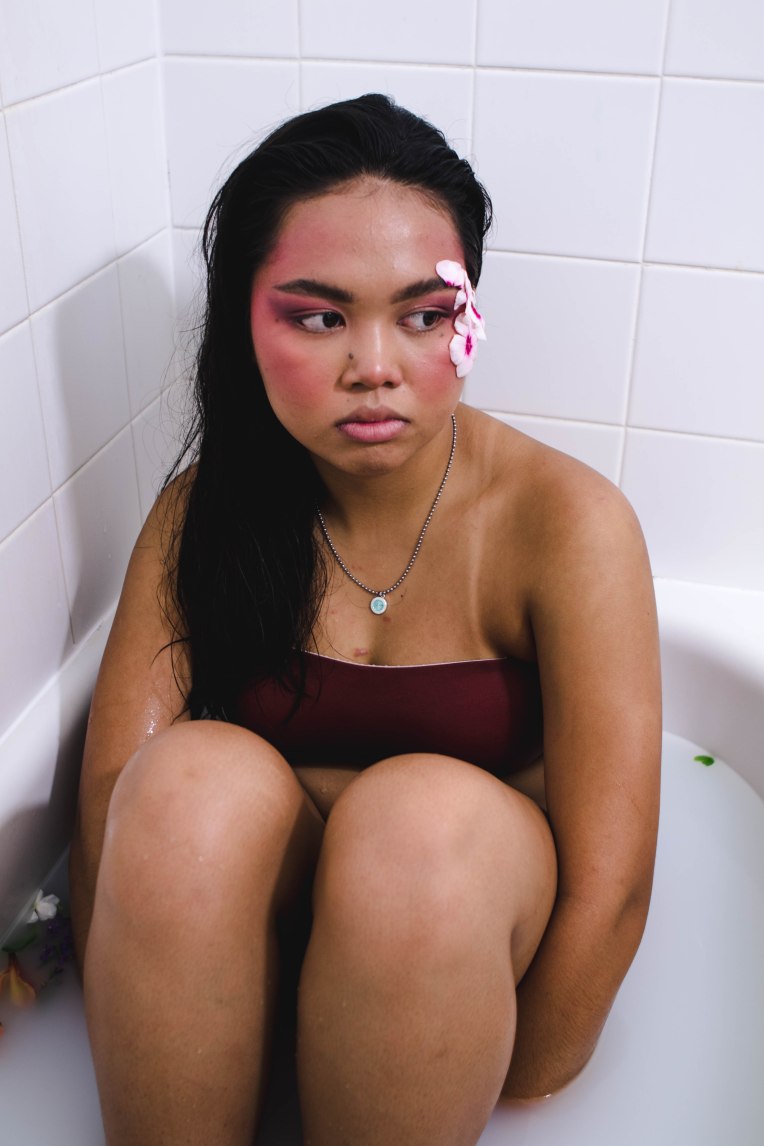
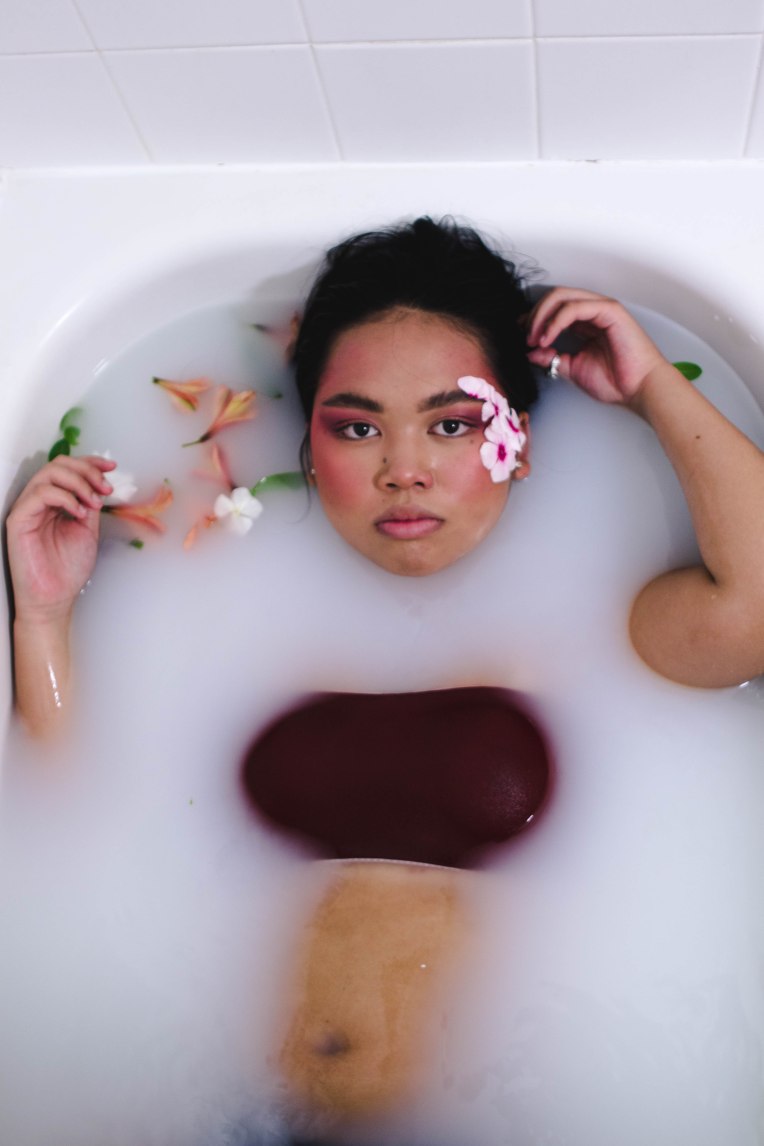
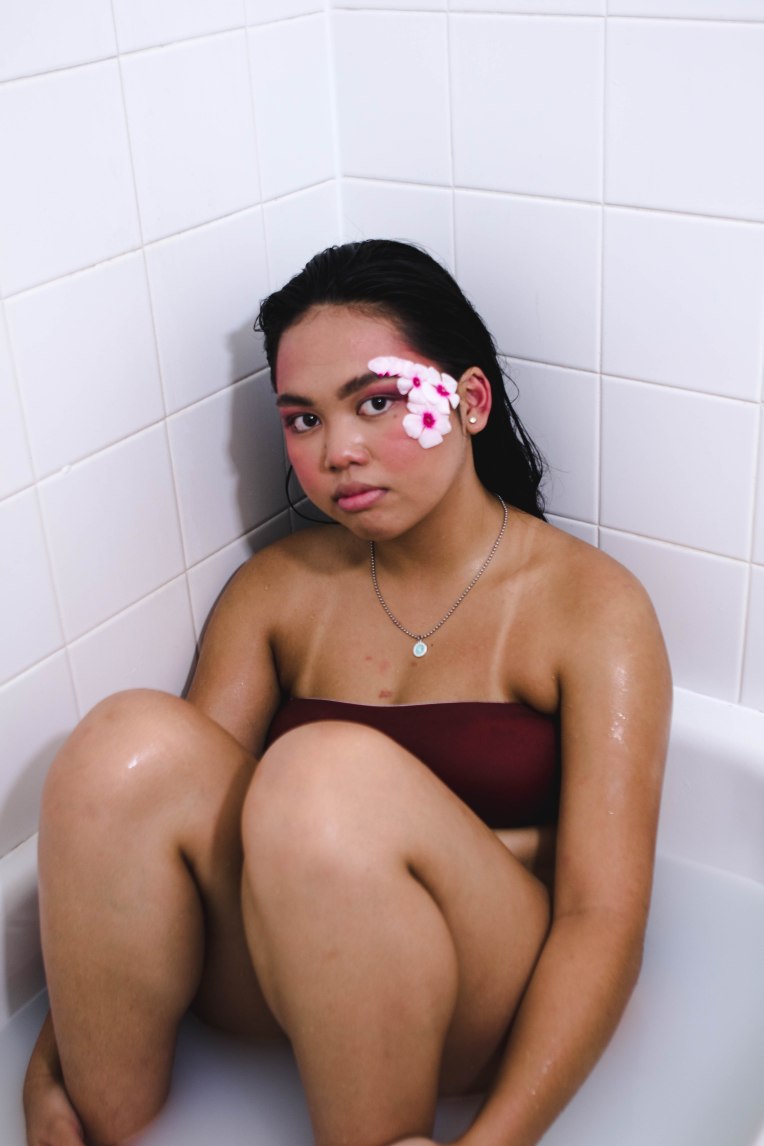
I edited these images with a more retro and faded style than I normally would, using Lightroom to create a vintage look in these images.

Camera: Canon EOS 7D Mark ii

Lens: 24-85mm- used 35mm setting

Aperture: 3.5

ISO: 250

Want to do a shoot together? Click here for booking and pricing information!

Want to see more of my summer shoots? Click here!

Instagram: @goodallphotos

Facebook Page: @goodallphotographs

Contact me! goodallphotos1@gmail.com

Let’s get shooting!


How To: Edit Like Brandon Woelfel

If you look at Brandon Woelfel’s feed on Instagram you will notice a common theme in his images, a cotton candy color palette. Woelfel often uses Photoshop to achieve these unique colors in each of his images but I found a way to achieve something very similar in Lightroom. Here are the steps to achieve a similar look to Woelfel, I, however, do not encourage copying his style in all of your shoots. I think it is important to emulate a photographer from time to time to learn how to shoot with styles different than your own and improve your photography game. Personally emulating Woelfel’s style showed me some tricks for photographing portraits at night that I might use in my own images.

First, you must photograph a model holding fairy lights at some time after golden hour. Woelfel often photographs at blue hour or at night time with artificial light to illuminate his image. I photographed at sunset into the night time and I didn’t have any trouble achieving the look. I would also recommend purchasing some serial killer/ oversized glasses to reflect more of the fairy lights. Mango Street made a Brandon Woelfel starter pack that is relatively inexpensive and a good starting point to begin photographing like him.

132A4925.JPG

Steps

  • After photographing the image you will begin your editing process.
  • I started by adjusting the temperature of the image to make it a lot cooler and making the tint a bit more magenta to achieve that aqua and pink look in Woelfel’s images.
  • Next, I turned up the exposure a little to bring back some light on his face and brought down the contrast to create more of a faded look in the image.
  • After that, I raised the shadows, dropped the blacks and dropped the whites almost all the way to add a little bit of contrast back in the image and even out the light distribution on his face.
  • Next, I played with the tone curve a little bit to create the crushed black look and created a slight S curve from that point.
  • I then played with the hues of the colors by making the yellows more orange, blues more aqua, aquas more blue, purples more magenta and magentas more purple which might sound a bit counterintuitive but it creates the colors that I wanted.
  • After I adjusted the saturation by dropping the saturation of the oranges and yellows and bringing up the saturation of the blue and magenta to emphasize the colors further. I also brought the luminance of all of the colors up slightly.
  • I added a pastel pink color into the highlights and a pastel blue color to the shadows to really create that cotton candy look to the image.
  • Lastly, I raised the vibrance up and brought down the saturation while also bringing down the clarity slightly.
  • I’m not saying these editing techniques will work for every image but they worked fairly well for me to create a similar looking image to something I thought Woelfel might create. For a more in-depth tutorial, I would recommend watching Mango Street’s video on this very technique.

132A4925

Untitled collage

Doing the Brandon Woelfel

In the past couple of years a photography icon as surfaced by the name of Brandon Woelfel. I’ve talked about Woelfel in my 5 Best Youtuber Photographers post before so many of you will already know who I’m talking about. Woelfel has become famous for his iconic fairy lights, rainbows and cotton candy color palette he uses in almost every one of his images. His photographs are extremely recognizable and well known around America especially after the release of his photo book Luminescence. Woelfel primarily photographs internet sensations such as Lilly Singh, Bethany Mota, and the DeMartino Twins as well as other models.

The trend #dothebrandonwoelfel consists of photographers taking photos of their models at night or at blue hour while incorporating some sort of artificial light in their images as well as heavy cool tones in post. I did not do this challenge to rip off Brandon instead I tried to see what parts of his style I could use to incorporate into my own photography and try to challenge myself. I almost never shoot past 7 so it was interesting to learn how to shoot without my friend the sun there to provide the natural light. This challenge has inspired me to do more night shooting with my own style incorporated but for now here is my take on emulating Brandon Woelfel’s style.

132A4925132A4929132A4935132A4946132A4993132A5035132A5094132A5134132A5145132A5157132A5171132A5174132A5187132A5209132A5251132A5331132A5345

Check out my post about how to edit like Woelfel using Lightroom to create this cotton candy color palette and edit under low light!

Want to do a shoot together? Click here for booking and pricing information!

Want to see more of my summer shoots? Click here!

Instagram: @goodallphotos

Facebook Page: @goodallphotographs

Contact me! goodallphotos1@gmail.com

Let’s get shooting!

Water Portraits

I recently have been interested in new and fun ways to spice up my portrait photography and really boost my photography game. In February I tried something called water portraits where the subject is submerged or surrounded by water. I was inspired by Alban Grosdidier’s series entitled, Drowning and decided to put my own twist on his beautiful shots. I hope you enjoy my interpretation of using water to create unique and interesting portraits.


shoot1_waterportraitsew19ew18e44e43e45e26e36e25e39e24e38e42e21e18e23e33e13e8e12e22e3e32e14e31e15e34e27e17e6e29e7e4e16e40e9e41e11e5e1

Model: Contact me at goodallphotos1@gmail.com for contact and booking information

Photographer: Nia Goodall at Goodall Photos

Shot with: Canon Rebel T6 and Canon 24-70mm 2.8

Want to do a shoot together? Click here for booking and pricing information!

Want to see more of my summer shoots? Click here!

Instagram: @goodallphotos

Facebook Page: @goodallphotographs

Contact me! goodallphotos1@gmail.com

Let’s get shooting!

Michaels Challenge

In recent months there has been a rise in popular photography trends such as the Ugly Location Challenge which transformed into the now known Hobby Lobby Challenge. This challenge was popularized by Kelsey Maggart who was simply trying to get a floral image during the middle of winter. The trend has spread across America and spurred other teens and photographers to follow suit. However, Hobby Lobby wasn’t as enthusiastic about this challenge as many people were and even kicked out multiple photographers. Luckily Michaels Craft Stores began encouraging photographers to take on the challenge at their stores, they even went as far to post on their official Facebook page that they wanted people to come and be creative. Photographers such as Jessica Kobeissi hopped on the opportunity and delivered a beautiful interpretation of the challenge.

I decided to hop on the trend and try it for myself. I had an amazing experience at the Michaels store near my home where every employee was very kind and encouraging throughout the whole process. I even saw another photographer doing the same as I and taking pictures of their friends as well. I think this is a fun challenge that people should try even if you’re not a photographer. I attempted to expand outside of the floral section and added some other areas of the store into my images. I hope you enjoy my interpretation of the Michaels Craft Store Photo Challenge.

132A0282132A0293132A0299132A0325132A0360132A0386132A0404132A0431132A0449132A0478132A0481132A0614132A0647132A0718132A0317132A0355132A0501132A0530132A0670132A0283132A0372132A0377132A0387132A0410

Model: Contact me for booking information at goodallphotos1@gmail.com

Photographer: Nia Goodall

Shot with: Canon 7D Mark II & Canon 50mm 1.4

Want to do a shoot together? Click here for booking and pricing information!

Want to see more of my summer shoots? Click here!

Instagram: @goodallphotos

Facebook Page: @goodallphotographs

Contact me! goodallphotos1@gmail.com

Let’s get shooting!


Dramatic Portraits

I’ve recently tried to get better at taking portraits of people. Here are a few of my favorites from a recent photoshoot that I did. If you like any of these make sure to comment which one is your favorite, I love having your input on things.

This slideshow requires JavaScript.

Portrait Photographs

After studying the work of Richard Avedon I was able to take these portrait pictures. Comment below which is your favorite of 1-29 or take the poll at the end.

CMedit1.jpg
Image 1
CMedit2.jpg
Image 2
CMedit3.jpg
Image 3
CMedit5.jpg
Image 4
CMedit6.jpg
Image 5
CMedit7.jpg
Image 6
EMedit1.jpg
Image 7
EMedit2.jpg
Image 8
EMedit3.jpg
Image 9
EMedit4.jpg
Image 10
EMedit5.jpg
Image 11

jfedit1

Image 12

jfedit2

Image 13

jfedit3

Image 14

jfedit4

Image 15

jfedit5

Image 16

jfedit7


Image 17

smedit1

Image 18

smedit2


Image 19

smedit3

Image 20

tpedit

Image 21

tpedit1

Image 22

tpedit2

Image 23

tpedit3

Image 24

tpedit4

Image 25

tpedit5

Image 26

tpedit6

Image 27

tpedit7

Image 28

jfedit6


Image 29

Poll (you may vote as many times as you want)

Check out my other posts & make sure to vote.

Abstract Photography 

Macro Photography

Architecture Photography 

Landscape Photography

Portrait Comparison