Photography is an art form that boils down to three essential points: composition, lighting and editing, everything else after these three puts a person beyond an average photographer. In this post, I’m going to cover these three essentials that every photographer should know about.
Composition
Composition is a very wide grouping because there are so many things that can fall under it. Here I am going to cover the basics that every photographer should know.
Rule of Thirds: This rule essentially states that there are three segments of an image, you will be able to see this best if you turn on the grid function of your iPhone and notice there are three distinct areas. To create a correctly composed image you should position your subject in the center of one of these thirds. For example in the images below you can see how one might position in the right third, left third or center third.


hipster portraits + golden hour portraits ii
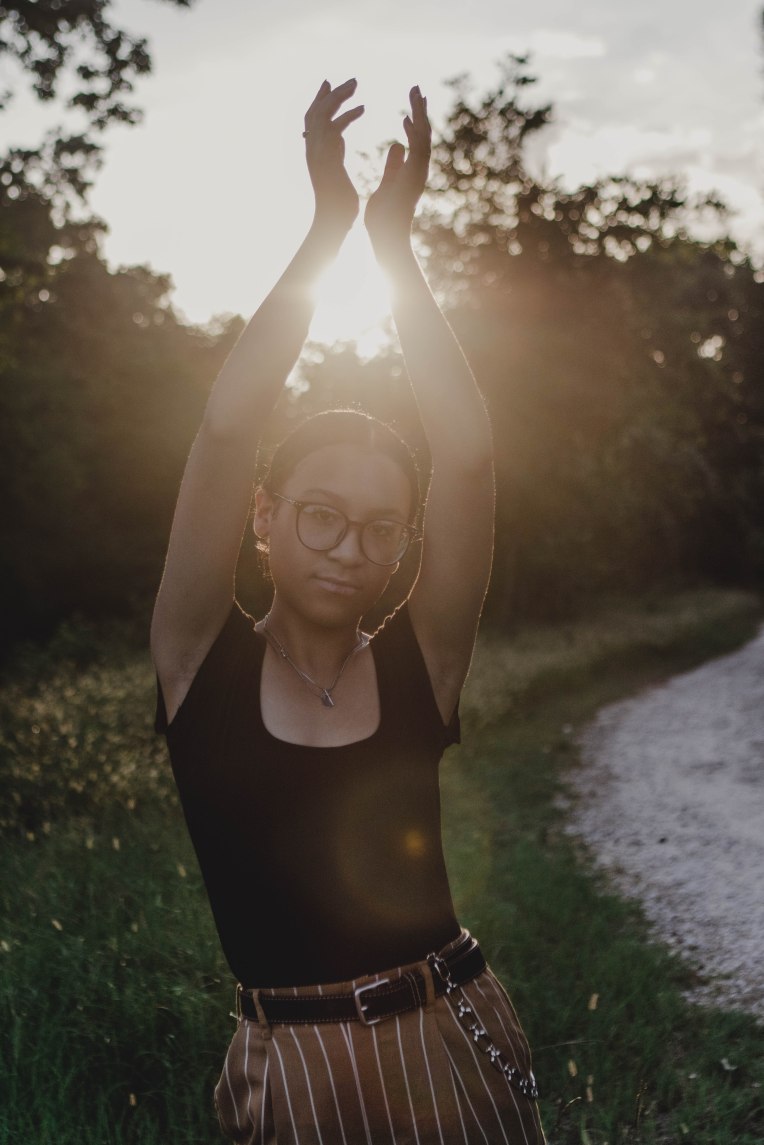
Simplicity: Simplistic images are ideal so your eye doesn’t get distracted by things in the image. It is best to limit the number of objects or distractors when photographing anything. As Sorelle Amore says it is best to keep your images within the 3 items rule stating that your image should have at most three things in it at once. If your image has more than 3 things in it it is recommended to turn it black and white so your eye doesn’t also have to focus on color. In the image below there are three things happening in the image, the sun, the road and the model.
Curves: S and C curve are essential for adding movement in your images because they allow your eye to follow the shape of the S or C. I love using this in my images because it guides your eye to what I want it to see. Similarly leading line composition does the same thing except the lines are straight. Curves are predominately used with female models because they are associated with feminity while straight leading lines are associated with masculinity and often used on male models.


golden hour portraits ii + water portraits
Framing: Framing your subject with surrounding objects or their own body parts is a great way to draw attention to their face or to the subject you are photographing. Framing can be as easy as bringing some hands above your head, positioning your model underneath some trees or the way rocks frame a vast landscape. If you see symmetrical objects on either side of your subject try and position them/it in between these two objects to create a simple frame and an easy way to draw in your viewer’s focus.


Lighting
Lighting is an essential part of photography. Harsh lighting can result in images that are hard to edit in post or even turn out well. I highly recommend shooting at golden hour if you are a beginner photographer or even just any photographer. At golden hour the light is even on your entire subject which avoids harsh shadows that might ruin your photo. Avoid shooting from 11-4 however if you have to shoot at this time in the day here are a few tips to help you.
- Angle upwards. Have your model angle your head towards the light so the shadows are cast on their neck and not their face.
- Bright Colors. Style your model in bright and dynamic colors to distract from the bright light, bright colors also photograph the best during midday.
- Not Too Hot. Stay aware of the temperature. If you live in the South you’ll know that 11-4 is the hottest part of the day so make sure you shoot your close-up portraits first to avoid any detailed sweat in the portrait
- Stay hydrated. I know this sounds stupid but sweaty models and photographers are never a good combination so make sure you’re hydrating, heavy equipment and blazing sun are not a good match.
- Shoot Dark. This is apart of my personal style but I think it is really helpful in the editing process if you shoot slightly darker than what your meter reading says. If your meter changes in the middle of the shot and goes lighter it’s okay because you’re already slightly darker. Also, it is much easier to brighten up an image slightly with exposure, whites & shadows than it is to darken an image. Shooting darker also gives your images a moodier feel.


golden hour portraits + golden hour portraits ii
Editing
Editing can change so much in an image. I personally like to edit a lot in Lightroom and I actually have many lightrooms presets that I use in most of my images, such as my Hipster Golden, Black & White Fade, and my Golden Airy presets. I think it is important to create your own personal style and then reflect that in all of your images. The easiest ways to set your photography apart is to use the Camera Calibration and Split Toning functions in Lightroom. I’m not going to share my exact editing workflow, however, I will tell you some editing do’s and don’ts.
DO
- Enable profile corrections before anything else
- Adjust black sliders to add more contrast
- Adjust shadows to add detail into the image
- Adjust HSL sliders to fit the skin tone of the subject first
- Edit your image to look like film that way even when editing styles age your image will remain timeless
- Watch editing tutorials of your favorite photographers and pick up on their tips
DON’T
- Develop your entire editing style around someone else’s
- Adjust the tone curve more heavily than creating a slight S shape
- Completely crush the whites or blacks
- Add a ton of saturation and vibrancy to your image it won’t age well
- Listen to everything I say these are my editing opinions but yours can vary, find your own style and rock it!

One thought on “Photography Tips for Beginners”